To install version 21 of OpenJDK with Homebrew on macOS (from the console)
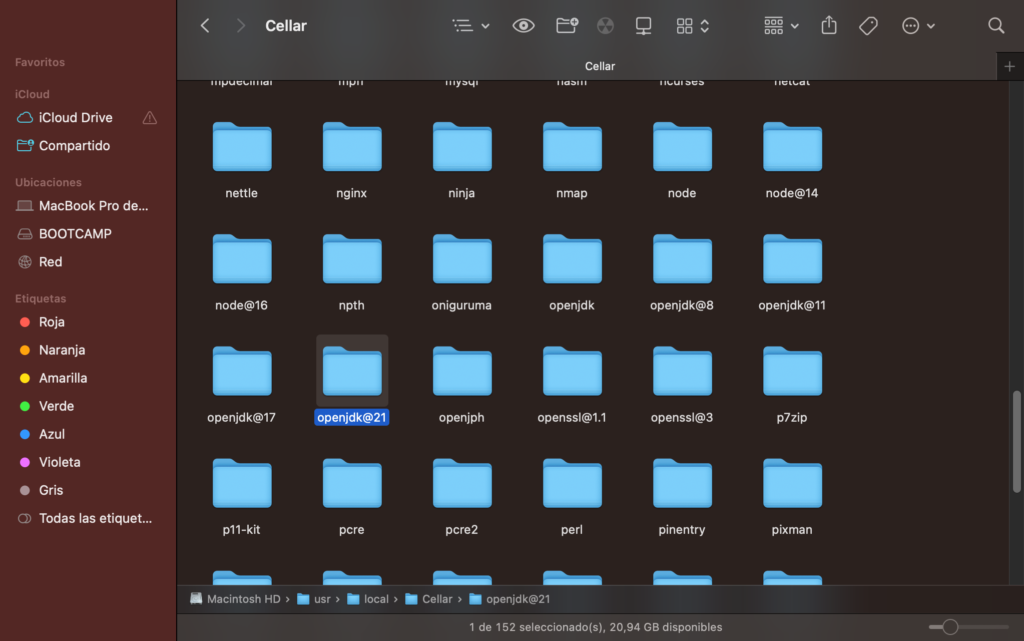
brew install openjdk@21Generally, different versions of OpenJK with Homebrew are installed in the /usr/local/Cellar location.
You need to modify the .zshrc and settings.json files in Visual Studio Code.
the
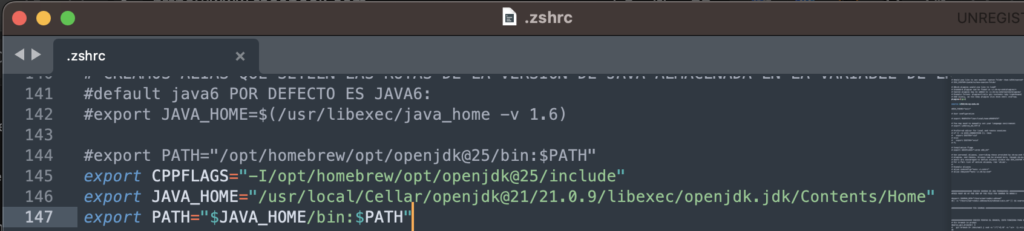
$JAVA_HOME
Enter the path to the Java installation you want (in my case, openjdk 21)
Then you must apply the changes to .zshrc with the command
source ~/.zshrc
There should be no other export path containing the location of openjdk
command that lists the installed versions of openjdk:
/usr/libexec/java_home -Vto see the current version of OpenJDK you are using:
java -versionin the settings.json file of Visual Studio Code
In this example I am using macOS
There are 2 settings.json files
- One is within the project itself (local configurations)
- .vscode/settings.json
- located at the root of the project
- settings.json for general configuration
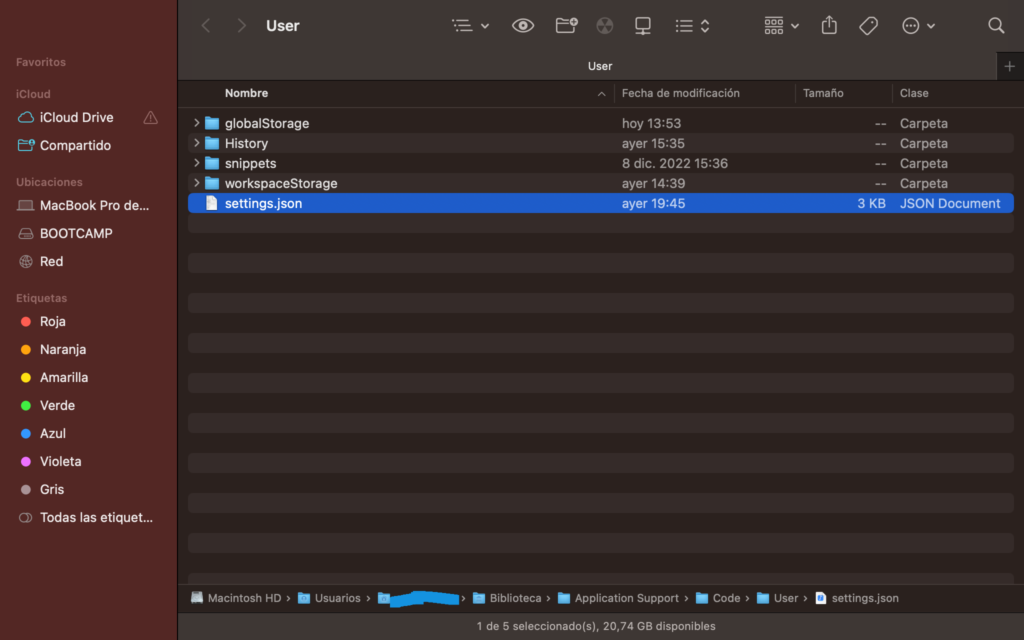
- located in /Users/xxxx/Library/Application Support/Code/User/settings.json
The things to be modified are:
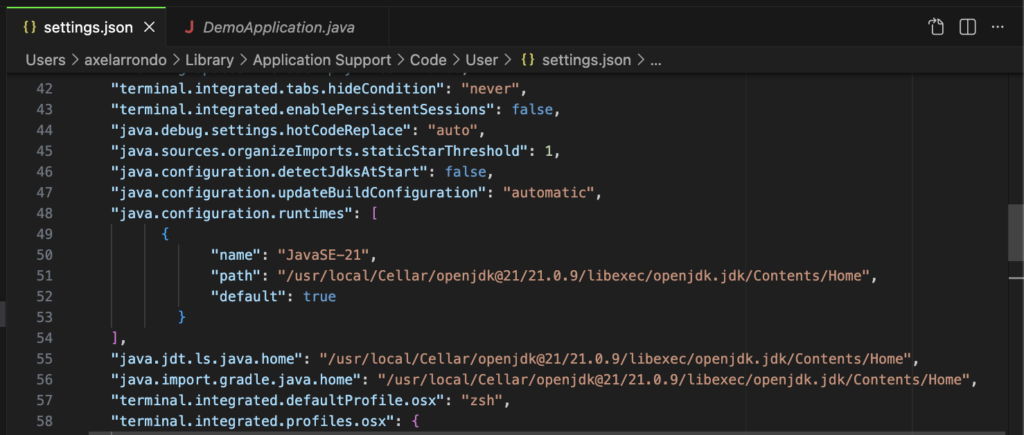
java.configuration.runtimes
"java.configuration.runtimes": [
{
"name": "JavaSE-21",
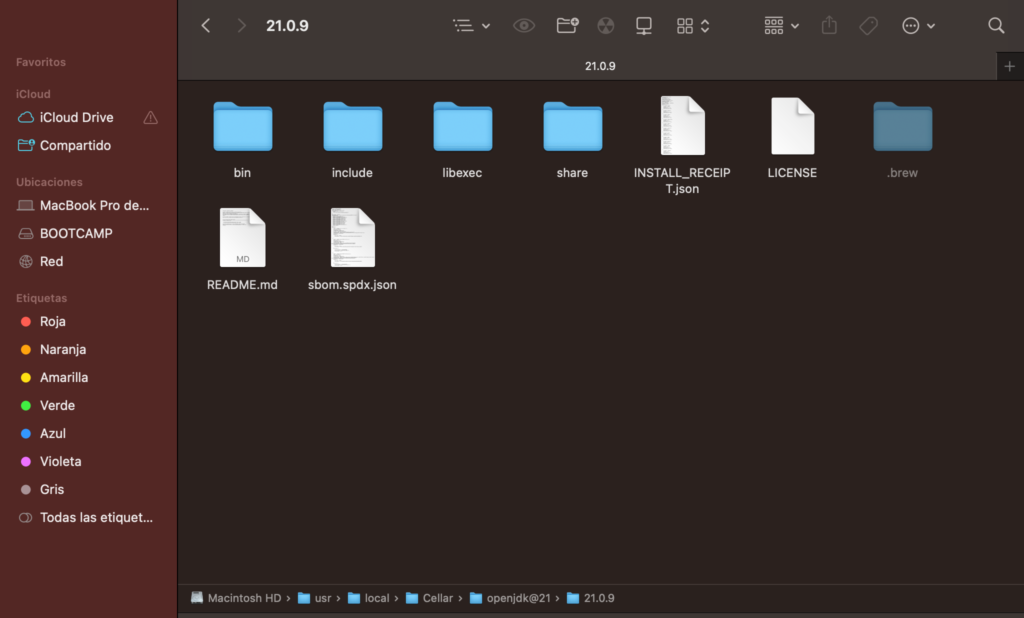
"path": "/usr/local/Cellar/openjdk@21/21.0.9/libexec/openjdk.jdk/Contents/Home",
"default": true
}
]The “name” field is purely descriptive; you can write anything there.
The “path” field is important; it’s the path to OpenJDK where to search.
The field “default”: true, is used to make it the first version of openjdk to search for.
java.jdt.ls.java.home
"java.jdt.ls.java.home": "/usr/local/Cellar/openjdk@21/21.0.9/libexec/openjdk.jdk/Contents/Home"java.import.gradle.java.home
"java.import.gradle.java.home": "/usr/local/Cellar/openjdk@21/21.0.9/libexec/openjdk.jdk/Contents/Home"You need to clear the Visual Studio Code cache and restart it:
To do this, you must press Command + Shift + P and the “Command Palette” will open in Visual Studio Code
You should write “Java: Clean Java Languaje Server Workspace” there
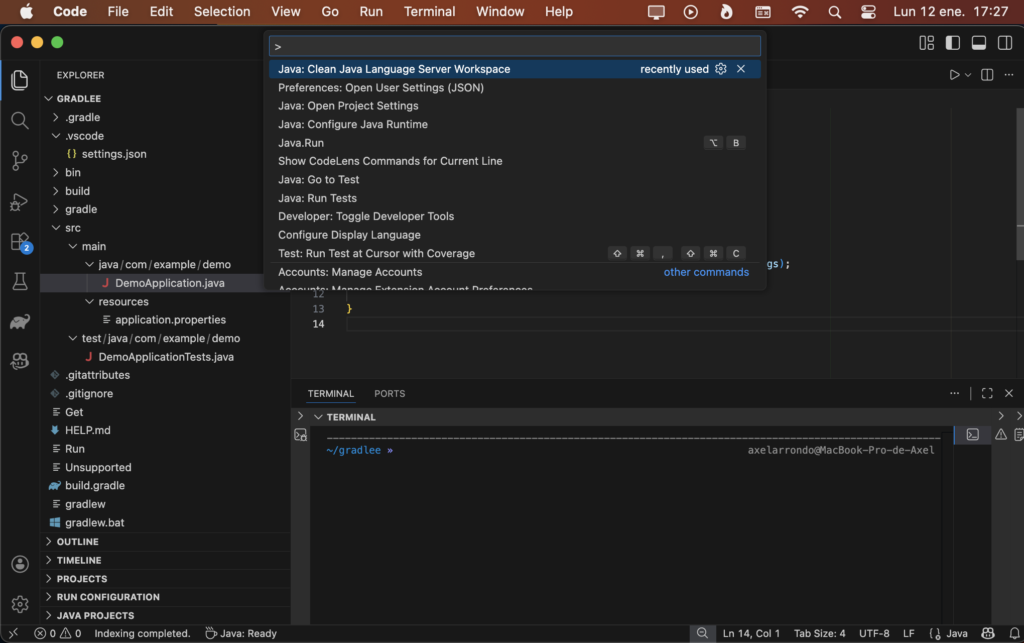
A pop-up window will appear in Visual Studio Code at the bottom right asking if you want to restart the IDE; click OK (reload and delete)
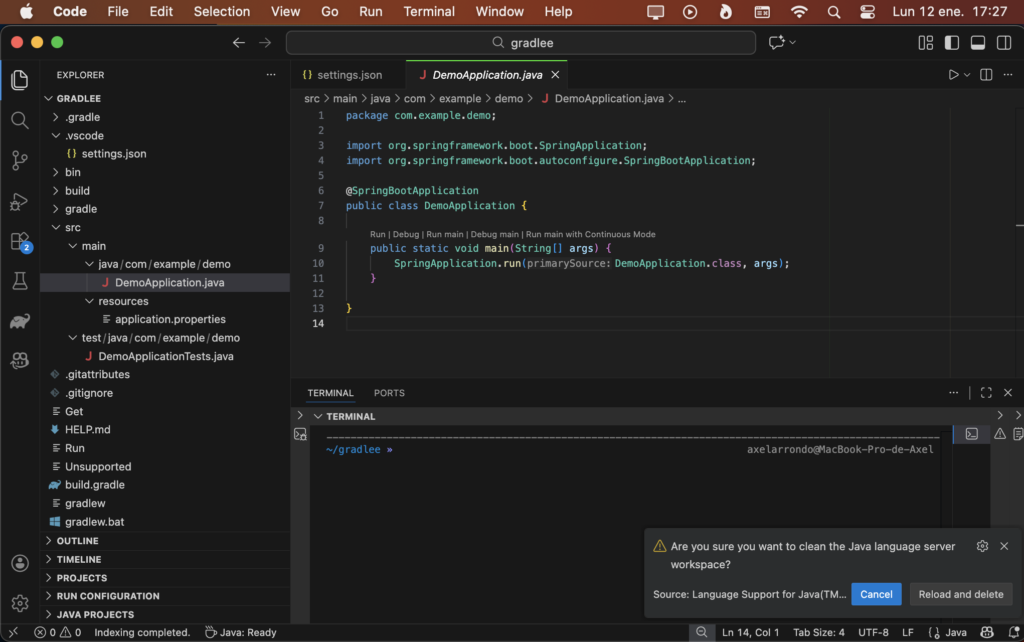
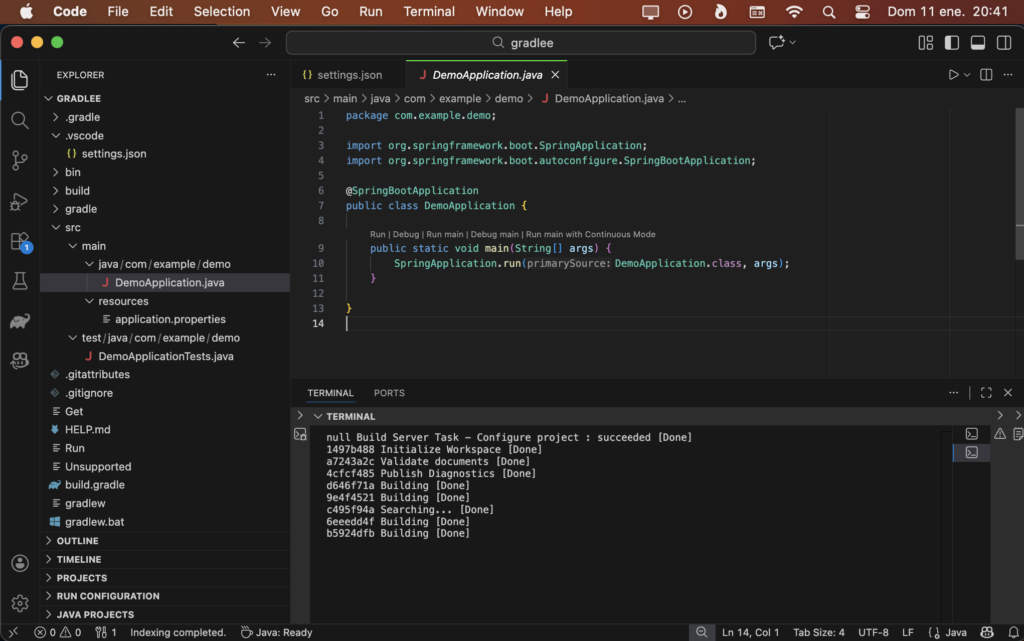
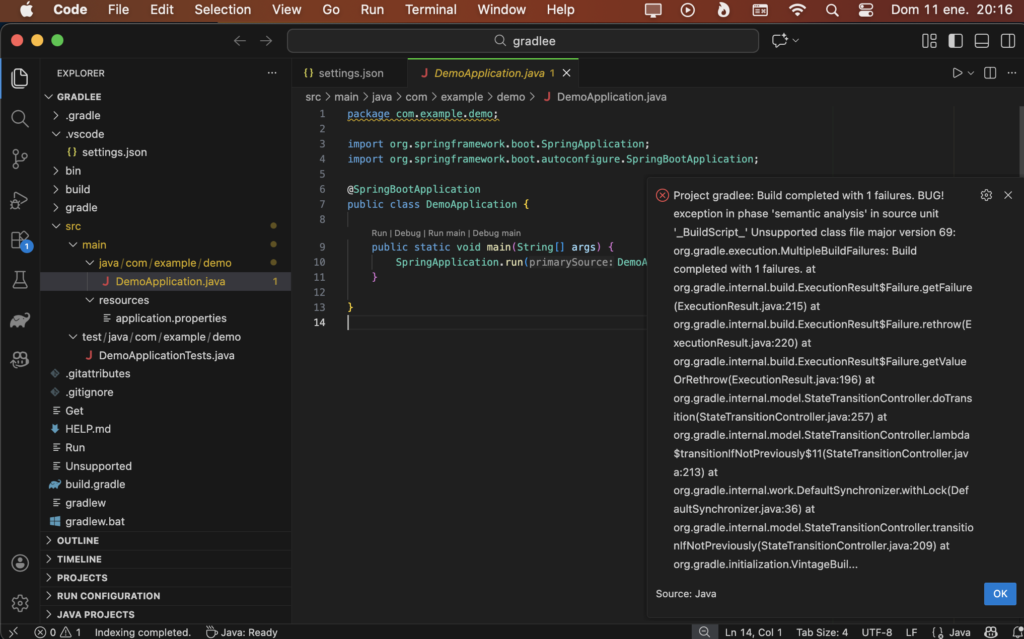
If everything goes wrong, you’ll see a message in Visual Studio Code; a message will appear in the bottom right corner indicating…
If everything goes well, you won’t see any errors and the syntax will be recognized.